Hi, my name is Kerri. I am wife to a retired Air Force husband, mommy to two beautiful little girls, and a life-long crafter. I started my blog about a year ago to showcase my creations and share the crafty love. This year also marks the first time I am part of a design team. I am currently designing for Trendy Twine and I couldn’t be happier about it! I am also working on creating my own stamp line as well as building a little online shop. Crafting is my joy. I do it because I love it and I hope you love the projects I share.

Happy Halloween Party

Trick or Treat Bag
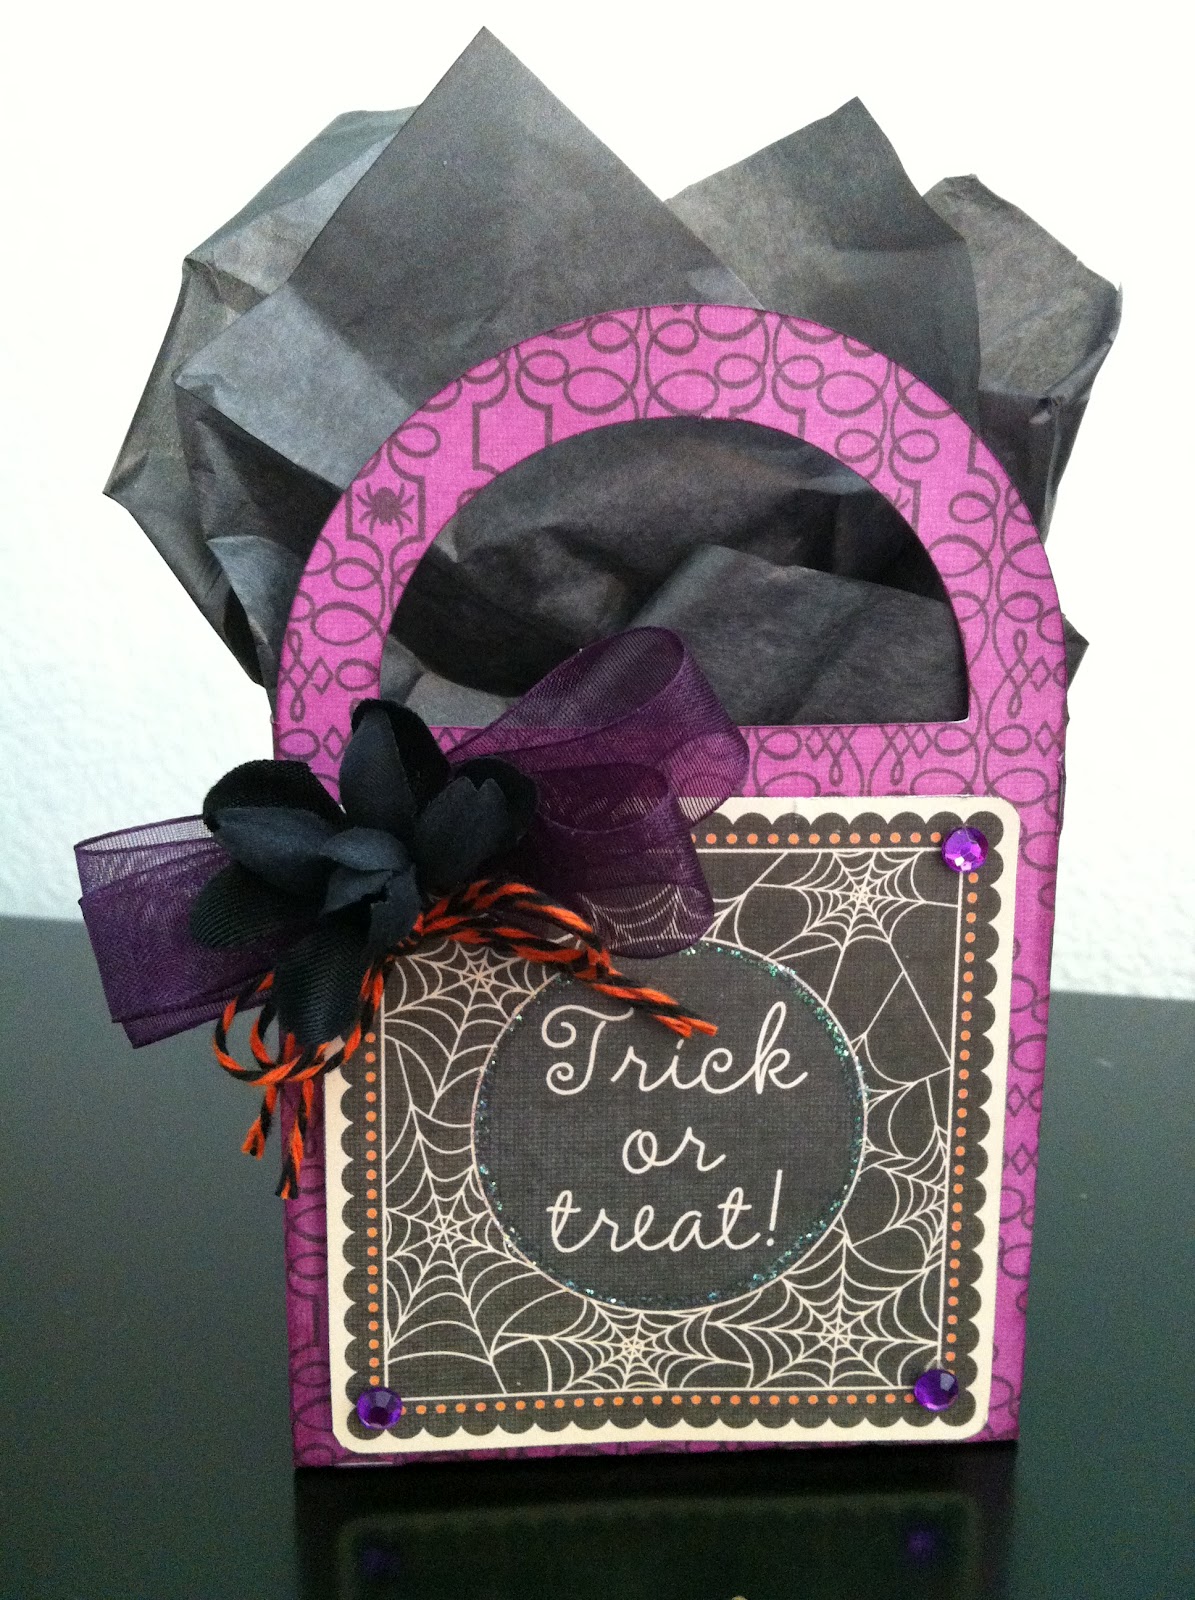 Cut the bag on page 23 of the Art Philosophy Cricut cartridge at Fit to Page size. Fold and glue together to build the bag. Ink all the edges with Tim Holtz Seedless Preserves Distress Pad. Cut the Trick or Treat card from the DCWV Bewitched stack and attach to the front of the bag using foam dots. In the top left corner of the bag attach a double bow made from the sheer plum ribbon, glue black flower in the center of the bow then a glue a double bow made from Orange Licorice Trendy twine under the flower. Adhere purple gems to the other 3 corners of the bag and apply stickles around the trick or treat.
Cupcake Stand and Topper
 Cut 4 of the stand bases, 1 support circle and 1 scalloped circle top from the Lifestyle Crafts Cupcake Stand die. Ink all the edges with Tim Holtz Ripe Persimmon Distress Pad. Glue the 4 base pieces back to back (step by step photos on my blog) to create the full base. Glue Orange Licorice Trendy Twine down the base to cover the fold lines. Embellish the edges with purple gems. Glue down support circle then glue scallop circle on top. Weave Orange Licorice Trendy Twine through the paper doily and glue it to the stand top. The topper is made from an owl image punched from the DCWV Bewitched stack using the Stampin’ Up postage stamp punch. Edges are inked with Tim Holtz Seedless Preserves Distress Pad. Purple gems are added for eyes and double Trendy Twine bow is glued to the bottom. Attach to the toothpick.
 Spooky Candle

Cut a strip of paper from the DCWV Bewitched stack, punch with Stampin’ Up scalloped border punch and ink the edges with Tim Holtz Ripe Persimmon Distress Pad. Add crystal stickle dots between scallops. Glue strip around candle then glue double strand of Orange Licorice Trendy Twine on top. Cut spooky Jack o Lantern tag and attach to candle with foam dots. Embellish tag with purple stones and crystal stickles to the Jack o Lantern face.
Supply List:
Trick or Treat bag- Cricut, CTMH Art Philosophy Cricut cartridge, DCWV Bewitched stack, Tim Holtz Seedless Preserves Distress Pad and applicator, sheer plum ribbon, Orange Licorice Trendy Twine, black flower, Crystal
stickles, purple gems, foam dots, Fabric Tac, black tissue paper
Cupcake Stand and topper- Lifestyle Crafts Cupcake Stand Die set, Sizzix Big Shot, DCWV Bewitched stack, Tim Holtz Ripe Persimmon Distress Pad and applicator, paper doily, Orange Licorice Trendy Twine, Stampin’ Up postage stamp punch, toothpick, purple gems, Fabric Tac
Spooky Candle- Flameless candle, DCWV Bewitched stack, Tim Holtz Ripe Persimmon Distress Pad and applicator, Stampin’ Up scalloped border punch, Orange Licorice Trendy Twine, Crystal Stickles, purple gems, foam dots, Fabric Tac